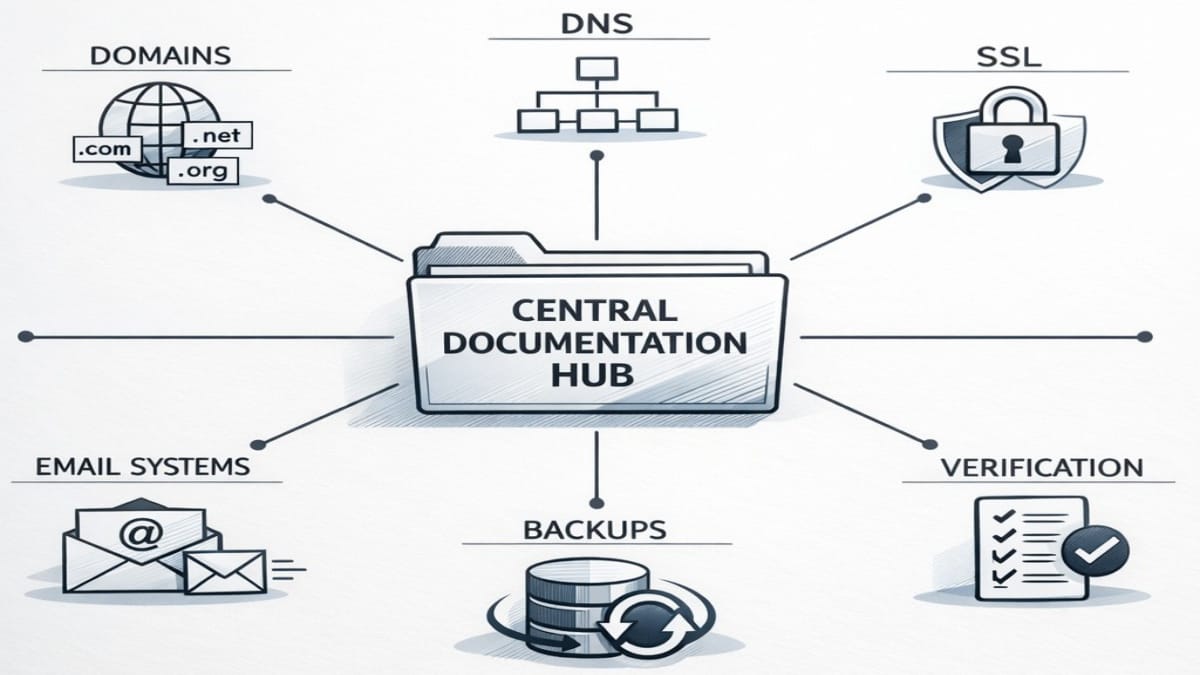
A visual representation of reusable infrastructure-level procedures for managing domains and services on a DirectAdmin VPS, emphasizing repeatable workflows and centralized operational reference.
Domains & Services
- PHP Settings for All New Domains – Updates PHP.ini/LSPHP via DirectAdmin.
- Account Domain ONLY: Add more DNS Records (part 2/7).
- Register Nameservers: iWebFusion (part 3/7).
- Register Nameservers: NameCheap (part 4/7).
- Assign Nameservers: iWebFusion (part 5/7).
- Assign Nameservers: NameCheap (part 6/7).
- Assign Nameservers: Other Registrars (part 7/7).
- QUIC.cloud DNS Zone Refresh.
VPS
DirectAdmin
Next Steps
Applying DirectAdmin System Packages Updates
- Logon to DirectAdmin as ‘admin’.
- From DirectAdmin Control Panel | ADMIN
- Go to <Server Manager> | <System Packages> and tap <Update All Packages> | <Confirm>.
- Wait until it’s entirely completed and stay active on the screen during this process.
- Operational Note: Sometimes, a server reboot is desired after this type of update. It has been known to resolve newly experienced issues at times.
Applying DirectAdmin CustomBuild Updates
- Logon to DirectAdmin as ‘admin’.
- From DirectAdmin Control Panel | ADMIN
- Go to <Server Manager> | <CustomBuild> | <Updates> and tap <Update All>. Wait for blue message to go away & read in terminal window “… is done”.
- Operational Note: Sometimes, a server reboot is desired after this type of update. It has been known to resolve newly experienced issues at times.
DNS Records Updates
Add DNS Records to All New Domains
- From DirectAdmin Control Panel | Admin:
- Go to <Server Manager> | <DNS Administration>
- Tap on the applicable domain’s name to open DNS records.
- Confirm you’re in the correct domain by reading the title.
- Tap to <Add Record> (this represents adding a DNS authoritative domain record).
- Record Type: A
- Name: *
- TTL: 1800
- Value: <Your server IP address>
- Tap <Add>.
- Tap to <Add Record> (this also represents adding a DNS authoritative domain record).
- Record Type: A
- Name: @
- TTL: 1800
- Value: <Your server IP address>
- Tap <Add>.
- Tap to <Add Record> (this represents adding a DNS authoritative domain record).
DNS Zone Removal from QUIC.cloud
There are times when it’s recommended to remove a domain that was registered with QUIC.cloud. Often, it can be just a temporary plan to execute. Sometimes, it’s a recommended practice after making DNS changes or Nameserver assignment changes of a domain. It’s a common practice that’s done to reassure the changed DNS records on a domain’s server get copied back correctly into QUIC.cloud’s system.
- So, start by removing it (from Settings in QUIC.cloud for this domain) from the account. Typically, it’s added back later, with more current DNS records.
- Consider adding it back after all DNS updates and Nameserver changes have been applied on your VPS. Or, alternatively, you can remove and add it back repeatedly after each set of changes to DNS or Nameserver assignments. Just ensure caching is fully cleared each time.
Register New Nameservers at Domain’s Registrar
New Account Domain (aka Primary Domain, First Domain, Server Account Domain) only: If the nameservers are not registered at this account domain’s registrar, follow these steps. Go to the Registrar name listed below or click the following list for assistance directly from their site.
Operational Note: Sometimes, it also assigns that domain to same newly registered nameservers.
- Bulk Helpful URLs for upcoming steps
- NameCheap: How to Change DNS for a Domain
- NameCheap: How to Connect a Domain to a Server or Hosting (see section 2)
- NameCheap: “How do I register personal nameservers for my domain?”
- and its Video: “Register Personal Nameservers”
- Operational Note: Ensure unmanaged VPS is running (that has the ns1 & ns2 nameservers).
- These running nameservers were just created in recent previous steps.
iWebFusion: Adding or Registering New NameServers
- Logon to domain registrar (iWebFusion).
- From “Client Portal”, tap on <Domains>.
- Scroll the list of domains, and tap on empty white space of applicable domain record.
- In domain Manage section (left pane), click on “Private Nameservers”.
- In right pane “Register a NameServer Name”, populate the 2 text boxes and <Save Changes>.
- Repeat for registering ns2.
- These nameservers can now be used on this registrar for client’s domains.
NameCheap: Adding or Registering New NameServers
- Logon to domain registrar (NameCheap).
- Go to <Domain List> | <Manage> on applicable domain.
- Click on tab “Advanced DNS”.
- Scroll down to section “Personal DNS Server”.
- Operational Note: You’ll now see if the VPS custom/personal nameservers are registered yet so they can be assigned to the domain account on Namecheap.
- In “Find Nameservers”, select option “Custom Nameservers”
- Populate host with part of nameserver name (e.g., ns1 or ns2) & tap <SEARCH>.
- If correct nameservers are listed, they are registered nameservers, available to be assigned to this domain.
- Note: the videos are confusing when they refer to ns1 & ns2 private nameservers as falling under “Standard Nameservers” to be registered there. A support email confirmed that, if I want my custom nameservers to be used on my VPS, I need to create them under “Custom Nameservers”, which only requests (host) names of my nameservers. No IP is set here.
- If the needed nameservers don’t appear here, proceed to their section named “Register Nameserver (Add Nameserver)”.
Assign Nameservers to Any Domain
These steps show how to assign previously registered nameservers to any domain. This is also how to change previously assigned nameservers. This is done on the domain registrar’s site for a domain. Below are shown several registrar’s methods & some URLs are given for various different ones. So, for the current domain in question, proceed to change the nameservers for it, using the registrar’s site.
Only if your nameservers are already registered at your domain’s registrar, you can the assign them to your domain. Applying these steps will temporarily halt public viewing of any existing, old website on another server. Also, you won’t be able to logon via WP-Admin anymore for that old site, if it exists. You will be able to logon when you create it as a new site on this new server and import in the backed up (exported) copy. Knowing that, from this point forward, continue to pursue these steps in order.
- From the domain’s registrar, change its domain’s nameservers.
- Example for iWebFusion registrar. Tap to open domain from domains list. It shows it’s locked but tap on URL “Change the nameservers your domain points to”. Assuming you named each one to start with ns1 & ns2, followed by the dot and your account domain name, change them to be:
- ns1.<your account domain name>
- ns2.<your account domain name>
The procedure varies with each registrar. So, I cover just a few registrars that I use but some helpful URLs show others. Know that assigning these registered nameservers gives you full DNS control over that domain if assigning the nameservers that exist on this unmanaged VPS.
iWebFusion Registered Domains: Assign Custom Nameservers
- While logged on to iWebFusion, ensure you’re on the Client Portal.
- Then, click on DOMAINS.
- From the Domain List, scroll down to change “Show 10 entries” to be “Show All entries”.
- Then, select check-boxes of all desired domains to reassign their nameservers.
- Click on the tab “Manage Nameservers”.
- This screen does not show current nameservers (by design). It shows the list of just selected domains about to change their nameservers.
- With the option preset to “Use custom nameservers (enter below)”, set the following:
- Assign Nameserver: ns1.<your account domain name>
- Assign Nameserver2: ns2.<your account domain name>
- Click <Change Nameservers>.
- If those nameservers are truly registered nameservers, the confirmation acceptance notification will be revealed. If any of those nameservers entered are not yet fully registered, an error will be shown and 1 or more of those nameservers will not be changed.
- To view the current nameservers assigned to a domain, go to the domains list. Then, click on any blank (non text) area of the desired domain. It will take you to the Manage screen for that domain. Just tap on “Nameservers” and the assigned nameservers will be displayed. Also, this is another way to reassign nameservers.
Namecheap Registered Domains: Assign Custom Nameservers
- Helpful Namecheap article on “How to Change DNS for a Domain”. Focus on section 2 for“CustomDNS” section for custom nameservers.
- While logged on to NameCheap, go to <Domain List> and tap <Manage> on applicable domain.
- You must take notes to copy all DNS records to reapply them, as needed, after the change. Some record might need updated IP addresses, of course. Those previous records will be deleted after any DNS type changing.
- Under the tab “Domain”, scroll down to row named “NAMESERVERS” & change the dropdown selection to “Custom DNS”.
- You must consider to take notes to copy all preexisting DNS records to reapply them, as needed, after the change. Some record might need updated IP addresses, of course. Those previous records will be deleted after any DNS type changing & Namecheap indicates it doesn’t recreate them if changing DNS type back.
- Assign Nameserver: ns1.<your account domain name>
- Assign Nameserver2: ns2.<your account domain name>
- Tap green check mark to “Save”.
- A completion banner will appear that indicates it might take up to 48 hours to propagate. However, there are still more steps to take to fully complete the entire DNS/nameservers process.
- You can confirm the assignments worked if you go to another menu and return back, apply a screen refresh, & see if the assigned NS records remain displayed.
- You must consider to take notes to copy all preexisting DNS records to reapply them, as needed, after the change. Some record might need updated IP addresses, of course. Those previous records will be deleted after any DNS type changing & Namecheap indicates it doesn’t recreate them if changing DNS type back.
About Other Registrars: Assign Custom NameServers
If not using NameCheap, many other registrars won’t have the automated setup for you to view, add, or delete nameserver registrations. Here’s more info on that.
- In trying to assign a custom nameserver to a domain, you get an error, then you must submit a support ticket to request the registrar to register the nameservers for you. Also, you’ll need to provide the IP address to point to.
- You can’t assign these private/custom nameservers to any domain until they’re registered through the domain registrar of that particular domain. Also, it might take time before you can use them to be assignable.
Actions After Assigning Nameservers
With different scenarios, there are different tasks to accomplish after assigning or changing assigned nameservers. Here they are.
- If the nameservers were the originally host’s default, supplied nameservers, there’s typically nothing special to do, other than continuing with the usual steps with configuring any new domain.
- If the nameservers were changed from a CDN’s requirement and then reassigned to this server, the task often requires a full cache clearing. Also, if this also involved DNS changes, then an update to the DNS records are also to be addressed. For example, removing the DNS zone from the CDN and then reapplying it with the freshest DNS records.
- Nameservers can also be the source of SSL certificates so, if the domain has been assigned away from, or added to, this account domain’s server, then a change to SSL is also a necessary step. It’s important to remove, or add, the domain from/to this server’s SSL management. Follow the appropriate section on this page, under SSL Certificates.
SSL Certificates
Moving Domains ONLY: SSL Removal Tasks
- If domain exists on another server, you MUST ensure to have removed the domain name from any assigned SSL certificate.
- Then, to validate its removal, ensure to request a cert renewal on old server so that the old domain is shown removed. That will free up the SSL validation tasks for the upcoming new server.
- Also, you might have to empty all cache types from that old server as well.
DirectAdmin USER SSL Configuration
- From DirectAdmin Control Panel | USER
- Go to <Account Manager> | <SSL Certificates>.
- Confirm you’re in the correct domain (top right).
- Change option to “Get automatic certificate from ACME Provider” (default was “Use the best match certificate”)
- ACME Provider: Let’s Encrypt
- Common Name:
- Select ckbox: Wildcard
- Selected entries…: Confirm it selected all checkboxes of “Certificate Entries”
- Select check-box of “Force SSL with https redirect”
- Tap small “Save” box.
- Click on large <Save> button.
- You probably will get a popup alert msg advising you it’s already processing another certificate.
- If you get a popup msgtelling you to wait, continue to the next step. Otherwise, if no popup msg, wait until it processes for about 2 minutes & then it provides a popup confirmation of certificates applied. Tap <Close>.
- Operational Note: If anything pops up with a lot of text in a content box, it’s not necessary to copy nor save it.
- You probably will get a popup alert msg advising you it’s already processing another certificate.
- Now, confirm a change of the above option to “Use the best match certificate”.
- Tap <Save>.
- Confirm you’re in the correct domain (top right).
DirectAdmin ADMIN SSL Configuration
- From DirectAdmin Control Panel | ADMIN
- Go to <Server Manager> | <Admin SSL>.
- Select check-box of newly added domain & tap <Settings>. Make these selections.
- Notify administrator account on certificate request failures.
- Notify users on certificate request failures.
- Do NOT select any other options.
- Verify “Fix certificates” section has selection of “LetsEncrypt certificates”.
- Click <Update>.
- From top, Tap <Server TLS Certificate> | <ACME Settings>.
- Confirm selected check-box to “Enable ACME” to automatically renew and replace server TLS certificates.
- ACME account e-mail address (Custom e-mail): admin@<account domain name>. Don’t use email addresses with added domains because, I’m using a chain certificate (i.e., shared by multiple domains with one account admin email address representing all).
- Key Type: ECDSA P-256
- ACME Provider:Let’s Encrypt
- Additional Domains
- ONLY IF this * record does not yet exist for this new domain, continue to next steps to add it.
- Add additional domain (starting with “*.”) to TLS certificate: *.<domain name>
- Tap <+ ADD>.
- Scroll down to bottom & click <Submit>.
- When prompted, Select the checkbox to “ISSUE A NEW…”. That’s because all steps now cover a chained SSL Cert.
- Tap <Confirm>.
- TIP: If you forgot to select the checkbox to “Issue a new…”, then tap <Server TLS Certificate> and tap <Renew Now> at “Automatic Certificates”. Then, tap <Renew Now>.
- Checkif default homepage for this domain is usually now working.
- From DirectAdmin Control Panel | ADMIN
- Go to <Server Manager> | <Admin SSL>.
- You can monitor the status of all domains. Just scroll all the way to the right. When it’s showing “Valid” = <Yes>, you’ll know it’s working. You can periodically refresh the screen; it takes about 3-5 minutes waiting. You’ll see a blue msg box briefly about 1 minute before the SSL cert shows “Valid”. When all 4 items are checked with a green “Yes”, the default site homepage then appears OK.
If SSL Issues Occur & Not Getting Final “Valid” Status on SSL Certificate
- Only if it seems you’re having issues on getting final SSL validations, try & check for any available updates in DirectAdmin Admin | Server Manager | System Packages. If updates are needed, you can apply them by following these sections’ checklists:
- Another cause can be that domain is using different nameservers, possibly due to your CDN requirements, like in QUIC.cloud CDN. If that’s the case, remove those domains from the Chain used for the server’s SSL certificate by following these steps.
- From DirectAdmin (Admin), go to Admin SSL.
- Click on <ACME Settings>.
- Scroll down and click to <Remove> any domains that are using different nameservers.
- Then, click <Submit>.
- Then, retry a server’s certificate renewal by going to Server Manager | Server TLS Certificate. Click on <Renew Now>. In a few seconds, you might receive the message it’s been renewed.
- If this is a domain move from an old server, ensure you removed the this domain from the SSL chain cert (or other SSL cert) on the old server.
- Don’t continue with remaining steps until the SSL Certificate shows as “Valid”, and preferably, for all 4 status items to be shown with a green “Yes”
SSL Validation Checks for Account Domain Only
- Now, check these items to verify these items are working correctly:
- Go to this account domain’s (website) Home page & confirm it has a default https page showing.
- You can logon to DirectAdmin using “https” & the path includes the domain name (e.g., server.primaryvps.com) and not its IP address.
- From DirectAdmin Control Panel | USER
- Go to <Extra Features> and tap each of the items listed there to ensure they open.
- Webmail: Roundcube: it uses the DirectAdmin Admin credentials.
- Note: Only confirm you can logon; then close.
- PhpMyAdmin: Just confirm it opens; then close.
- From DirectAdmin Control Panel | ADMIN
- Go to <Extra Features> and tap each of the items listed there to ensure they open.
- ConfigServer Security & Firewall
- If this CSF doesn’t appear, close browser & run the following commands in a terminal shell.
- wget http://files.directadmin.com/services/all/csf/csf_install.sh
- 945 /bin/sh ./csf_install.sh
- If this CSF doesn’t appear, close browser & run the following commands in a terminal shell.
Remove a Domain from DirectAdmin SSL
To remove a domain from SSL in DirectAdmin, follow these steps:
- From DirectAdmin – Admin go to: Server Manager | Admin SSL.
- Click on <Server TLS Certificate>. Then, click on <ACME Settings>.
- Scroll down to the domain to remove from the certificate and click <Remove>.
- Then, at the screen bottom, click <Submit>.
- Finally, you must then get a newer SSL Certificate for the server.
- From DirectAdmin – Admin go to: Server Manager | Admin SSL.
- Click on <Server TLS Certificate>. Then, click on <Renew Now>.
Redis Confirmation Tests & Fixes
Redis has already been set to run under the custom build options for the server. This is for confirmation, as well as to view & copy the “Path to redis socket file” for future use of this domain’s site.
- From DirectAdmin Control Panel | USER
- Go to <Advanced Features> | <Redis>.
- Confirm you have the correct domain shown (top right). Then, refresh the browser screen.
- If you see <Enable> button, tap it. If it’s already enabled, the current status will show “This account has Redis enabled” and a red <Disable> button is showing.
- Copy “Path to redis socket file” for later usage.
- Default path to copy might be: /home/admin/.redis/redis.sock
- Operational Notes & Workarounds/Fixes: Here are various redis commands only for Unix Sockets (aka “sock”), port = 0 that can be run:
- To test if redis is running
- systemctl status redis@admin
- To start redis (but doesn’t mean it will auto-start after a reboot)
- sudo systemctl start redis@admin
- To stop redis (but doesn’t mean it will stay stopped after a reboot)
- sudo systemctl stop redis@admin
- If redis not auto-starting:
- Sometimes, after a backup restoration, redis will no longer auto-start. The workaround fix is to logon to DirectAdmin | User and go to <Advanced Features> | <Redis>. Tap to <Disable> and then tap again to <Enable>. Also, this assumes that the other settings were correct to begin with and this was working before the backup restoration.
- To test if redis is running
Create Domain Admin Mailbox in DirectAdmin using Roundcube
All Domains Mail Overview
- A single default admin email account is automatically created when the account domain was created.
- However, currently there is only 1 mailbox & it handles multiple domain’s email addresses.
- Adding an “Identity” to that mailbox will provide an appearance of a separate mailbox for each domain, which is now covered in the following steps.
Create the Admin Mailbox Identity using Roundcube
- From DirectAdmin Control Panel | USER
- Go to <Extra Features> | <Webmail: Roundcube>.
- Use same admin credentials as DirectAdmin.
- From left frame, tap on “Settings”.
- Click on “Identities”.
- Observe that the default admin email address identity pre-exists for the entire server as admin@localhost. Be sure to leave it alone.
- Now, add this domain’s unique admin email identity.
- Tap <+> Create icon from top and make changes as follows:
- Display Name: (
Admin) - Examples: PrimaryVPS Admin, Linxent Admin, BaygentsOrg Admin
- Email: (admin@
) - Important: Do NOT change the name “admin” for this initial mailbox. Many systems rely on the existence of a default “admin” mailbox.
- Organization: (empty)
- Reply-To: (empty)(leave empty so it won’t overwrite other domains reply-to email address)
- Bcc: (empty)
- Set default: disabled (enabled is only for default initial one for the account domain >> admin@localhost)
- Signature: (empty)
- Click <Save>
- Display Name: (
- Optionally, you can Create other users at this time; however, unless it’s not urgent, it’s recommended to continue with remaining steps and add more users later when time permits.
- Close Mail session.
- Tap <+> Create icon from top and make changes as follows:
How to Enable DKIM in DirectAdmin for Mail
- From DirectAdmin Control Panel | USER, go to <E-mail Manager> | <E-mail Accounts>.
- Select the correct domain (top right); then, tap to <Enable DKIM>.
- If it’s already showing enabled, and you’re having an issue or seeing a failed test of DKIM, tap it to disable it, and then re-tap it to enable DKIM again.
- Select the correct domain (top right); then, tap to <Enable DKIM>.
How to Confirm DKIM Is Enabled for Mail
- Test to Confirm DKIM.
- Go to https://dmarcly.com/tools/dkim-record-checker
- Domain: <your domain name>.
- Selector: x
- Operational Note: The DKIM selector used by DirectAdmin is customized as “x”.
- Tap <Check DKIM Record>.
- If it’s confirmed fine, you’re done. However, if there’s a DKIM issue or failed test, see “How to Enable DKIM in DirectAdmin for Mail”.
- Go to https://dmarcly.com/tools/dkim-record-checker
How to Add rDNS on the Account Domain Server
rDNS is needed on this VPS mail server because most other big branded mail servers won’t accept emails from it without rDNS.
This is done only ONCE and it’s only on the account domain’s server. Also, it stays with a server rebuild but only if the previously used server name is re-used exactly, as well as the same IP address. Otherwise, you have to ask your host provider to activate rDNS again.
1. Check if Account Domain Server already has rDNS
To start, you can use the beginning of this process to check what the current rDNS entry is showing. That’s because this record is not kept on this unmanaged VPS. So, check with your host provider for testing and requesting to add rDNS. For an example, the SpeedyPage host provider has the steps to verify it and to change it.
2. SpeedyPage (VPS Host): Request rDNS on Account Domain Server
- Helpful URL: SpeedyPage “How to configure rDNS records on our VPS platform”
- SpeedyPage states: All entries must have a corresponding forward record already set at the domain’s DNS provider.
- Logon to SpeedyPage Client Area.
- In “My Dashboard”, click <Services>.
- Then, tap on this Virtual Server.
- Scroll down to the “Management Actions” section & click <Open Control Panel>.
- Take note of the displayed FQDN (hostname), e.g., server.<my account domain>
- From the top menu bar, click “Network” tab.
- Scroll down to section “IPv4 Addresses”.
- If <Reverse DNS> is showing, that means it currently does NOT have an rDNS entry and needs it.
- So, click <Reverse DNS> button.
- In the prompt, enter in the previously displayed FQDN (hostname): server.<my account domain>
- Click <Update>. Then, close this popup box.
- Then, when you bring up “Network” in the future, the <Reverse DNS> button no longer appears but the IPv4 Addresses section now has a column named “RDNS” info show up.
- Consider option to forward all emails to personal email address.
Run a Live Email Test on Account Domain’s admin mailbox
- From DirectAdmin Control Panel | User, go to <Extra Features> | <Webmail: Roundcube>.
- Tap to
a new email. - Change “From” (selecting dropdown box) to be the admin of this domain being tested.
- Make the “To” recipient be someone with a Gmail account or other popular external mail account. The Gmail type of email address is among the strictest mail server requirements so that’s why this is a suggested test use case.
- Populate the subject and content briefly.
- Click <Send>.
- From a Gmail (or other popular brand) account, send a test email to that admin’s mailbox.
- It might take a 2-3 minutes delay to receive.
- If one or more of the above emails didn’t get received, consider to proceed with the next steps in the “Open Ports Request” section.
- Tap to
For Mail Issues: How to Submit an Open Ports Request
OVERVIEW: This is an example used for the VPS host provider, SpeedyPage. Following this example is good for preparing your own provider’s ticket or email to submit.
These tasks are only done once with the VPS server’s host provider because it involves ports permitted on the entire VPS account. Its settings remain in place, even with a server rebuild. It’s on the host’s network outside of this VPS and is tied to its IPv4 address only.
- Helpful URLs
- Important: This is done only once per server’s IP address
- Review this article on this VPS host provider: SpeedyPage mail ports restrictions
- From the Client Area, click on “Services”.
- From the list of “My Products & Services”, click on this listed server.
- Then, scroll down to the “Request SMTP Access” section & copy-and-paste the following listed items.
- Intended use for the outbound mail ports: calendar alerts, administrative error alerts, transactional emails, site visitor comment replies, newsletters, subscriber announcements.
- Estimated email volume: low
- I have DKIM and rDNS enabled.
- Email is setup via RoundCube, native to DirectAdmin web panel.
- Ports requesting access to: 25, 110, 143, 465, 587, 993, 995
- Finally, click <Submit Request>.
Or, for your own host, use this information gathered to submit your own support request ticket or support email.
Test if DMARC Record exists
- Go to https://dmarcly.com/tools/dmarc-checker
- Domain: <your domain name>
- Tap <Check DMARC Record>.
- Generally, there’s no DMARC Record yet so, if that’s still true, proceed to generate one.
Generate a new DMARC Record in DirectAdmin
DirectAdmin has a built-in DMARC Generator that’s natively a part of adding a DNS record. And it’s an extremely high detailed one.
- From DirectAdmin Control Panel | Admin, go to <Server Manager> | <DNS Administration>.
- Tap on the correct domain from the domains list at the bottom.
- Confirm the “Edit DNS Records for…” shows the correct domain name.
- Click <Add Record> and populate with the following items.
- Record Type: TXT
- Name: _dmarc
- TTL: 3600
- TXT Record Type: DMARC
- Domain policy type: Reject
- Subdomain policy type: Select (choose “same as domain”; the word “Select” will remain)
- Aggregate Email (RUA): add admin@<domain name>, or leave blank to not receive reports); however, skipping this email address here is not recommended.
- Forensic Email (RUF): (leave blank)
- Report Format: (default: “Authentication Failure Reporting Format”)
- Reporting Interval: 86400 (default is 24 hours = 86400)
- Percentage: 100 (default = 100)
- Alignment mode for DKIM: Relaxed (default = Relaxed)
- Alignment mode for SPF: Relaxed (default = Relaxed)
- Value: (automatically generated, based on above selections; however, can now be manually changed if desired).
- Click <Add>.
- Operational Notes
- Confirm DMARC record now is found by testing at https://dmarcly.com/tools/dmarc-checker.
- Sometimes, it takes about 3 minutes after adding the DMARC record to DNS to resolve.
- Results might be in red if a single required minimum item is “not found”, e.g., if a scheduled RUA report’s “Aggregate Email” address is not found or if a “domain policy type” is not assigned, the results will be in red.
- Typically, the result will include having at least 1 item “DMARC record found”.
How to Enable Security.txt (RFC9116) for DirectAdmin Users
This is applied just once and it will automatically established for all DirectAdmin users in all domains.
- From DirectAdmin Control Panel | ADMIN
- Go to <Account Manager> | <My Users>.
- On the right pane, select individual users or (or click <Modify Your Own User Data>)
- Scroll down to section “Manually Change Settings”
- Automatic security.txt (RFC9116): Enabled
- Click <Save>.
- For verification, from DirectAdmin Control Panel | ADMIN
- Go to <Server Manager> | Security.txt Report. The domains should all be valid (green check-marks). However, sometimes, it takes about ½ hour later.