Purpose
This post establishes the DNS and nameserver prerequisites required before SSL certificates and mail configuration can safely begin.
The steps in this post involve both DirectAdmin and the domain registrar, and may also require cleanup or refresh actions in external DNS providers.
This sequence is mandatory. Skipping or reordering these steps commonly causes SSL issuance failures and mail authentication problems.
Scope and Applicability
- Applies to the Account Domain only
- Performed one time per VPS
- Establishes DNS and nameserver behavior inherited by future domains
Prerequisites
- The account domain exists in DirectAdmin
- PHP settings and DirectAdmin user defaults are complete
- No SSL certificates have been issued yet
- No mail authentication has been configured yet
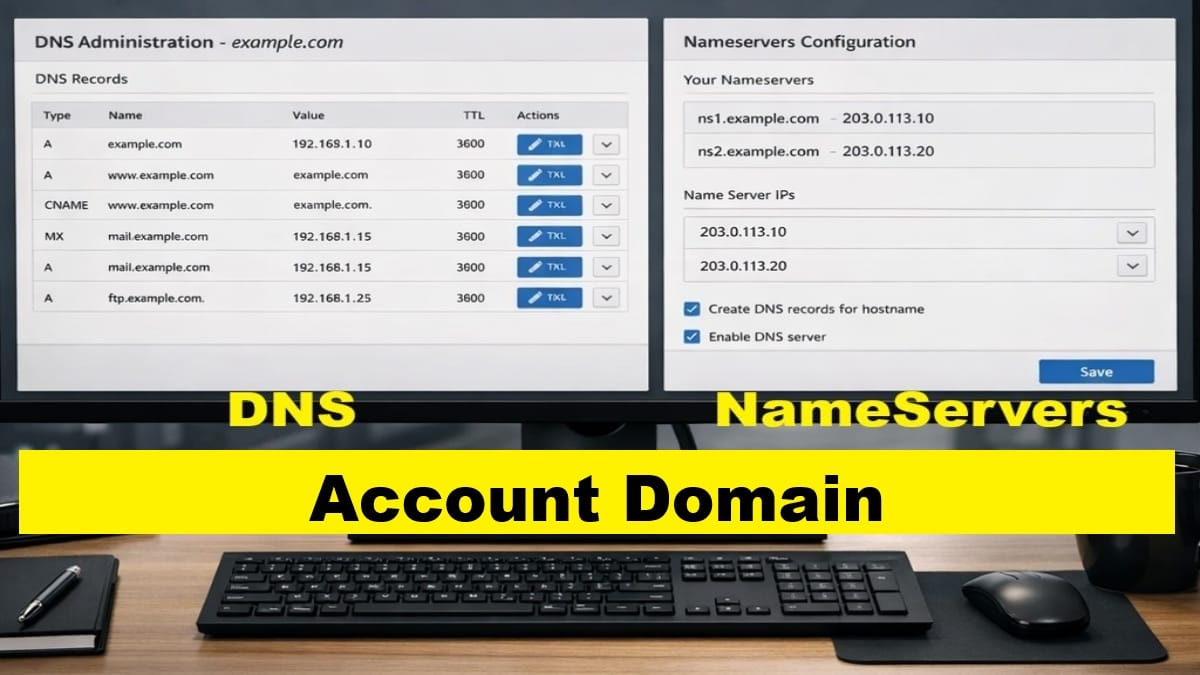
Add Required DNS Records in DirectAdmin
With the account domain created and PHP defaults applied, DNS records can now be added.
At this stage, only add the DNS records required to:
- Establish authoritative resolution
- Prepare for SSL certificate issuance
- Prepare for mail authentication steps
Follow the DNS procedures referenced in this workflow and apply only the records explicitly required at this point.
- First, add these DNS records, which are steps performed for all domains.
- Then, continue with these steps below, which are unique and ONLY for the account domain.
- Tap to <Add Record> and populate with this data.
- Record Type: A
- Name: server (or use the name of this server you chose in the VPS setup)
- TTL: 1800
- Value: <your server’s IP address>
- Tap <Add>.
- Tap to <Add Record> and populate with this data.
- Finally, after any DNS changes, if using an exterior DNS service (like litespeed CDN), you’ll need to consider updating those records also. For litespeed CDN, refer to the following guidance.
- DNS Zone Removal from QUIC.cloud (for removal & adding back to update DNS records).
Do not attempt to complete final DNS configuration yet.
Register New Nameservers at the Domain Registrar
If this VPS will use its own nameservers, they must be registered at the domain’s registrar before they can be assigned to the domain.
Use the canonical procedure:
This step is performed once per nameserver pair. So, after they’re registered, the nameservers pair can be easily assigned to any new domain hereafter without registering again.
Assign Nameservers to the Account Domain
After nameservers are registered, assign them to the account domain at the registrar. There might be a short period of time this server is inaccessible to you directly by name. But, you can still have access, of course, via URLs that use it’s IP address.
Follow the canonical procedure:
Only assign nameservers that have already been registered.
External DNS Provider Cleanup or Refresh
If the domain was previously managed by an external DNS provider, those records may conflict with the new authoritative DNS zone.
If QUIC.cloud or another external DNS provider was used, strongly consider performing a cleanup or refresh now.
For QUIC.cloud, follow:
- DNS Zone Removal from QUIC.cloud; note that this is a temporary removal and then replace with fresher DNS records.
This ensures stale DNS data does not interfere with SSL or mail configuration.
Verification
Before proceeding, confirm:
- Required DNS records exist in DirectAdmin
- Nameservers are registered at the registrar
- Nameservers are assigned to the account domain
- No SSL certificates have been requested yet
Allow time for DNS and nameserver changes to propagate as required. If inaccessible for long periods, consider accessing via its IP address. Also, consider emptying your browser’s cache, if needed.
Stop Point
Do not perform any of the following yet:
- Request or assign SSL certificates
- Configure mail services or authentication
Those steps depend on DNS and nameserver changes being fully in place.
Next step:
Proceed to the next post to begin SSL configuration for a domain, once DNS propagation and verification are complete.