Immediately after installing OpenLiteSpeed (OLS) using DirectAdmin, several CustomBuild options must be applied after installing OLS, before continuing with any additional server setup. These options ensure required PHP versions, extensions, Redis support, and background services are correctly enabled. And, after that, applying an automatic CustomBuild update finalizes the process.
This guide is part of the Platform Readiness phase of building a DirectAdmin VPS.
The CustomBuild update process shown here is not unique to OpenLiteSpeed. The same update steps may be required later whenever CustomBuild options are changed, new services are enabled, or PHP versions are modified.
Apply CustomBuild Options
- Log in to DirectAdmin:
http://<VPS_Server_IP_Address>:2222/- At this stage, DirectAdmin uses HTTP and the server IP only.
- From the DirectAdmin Control Panel (Admin level):
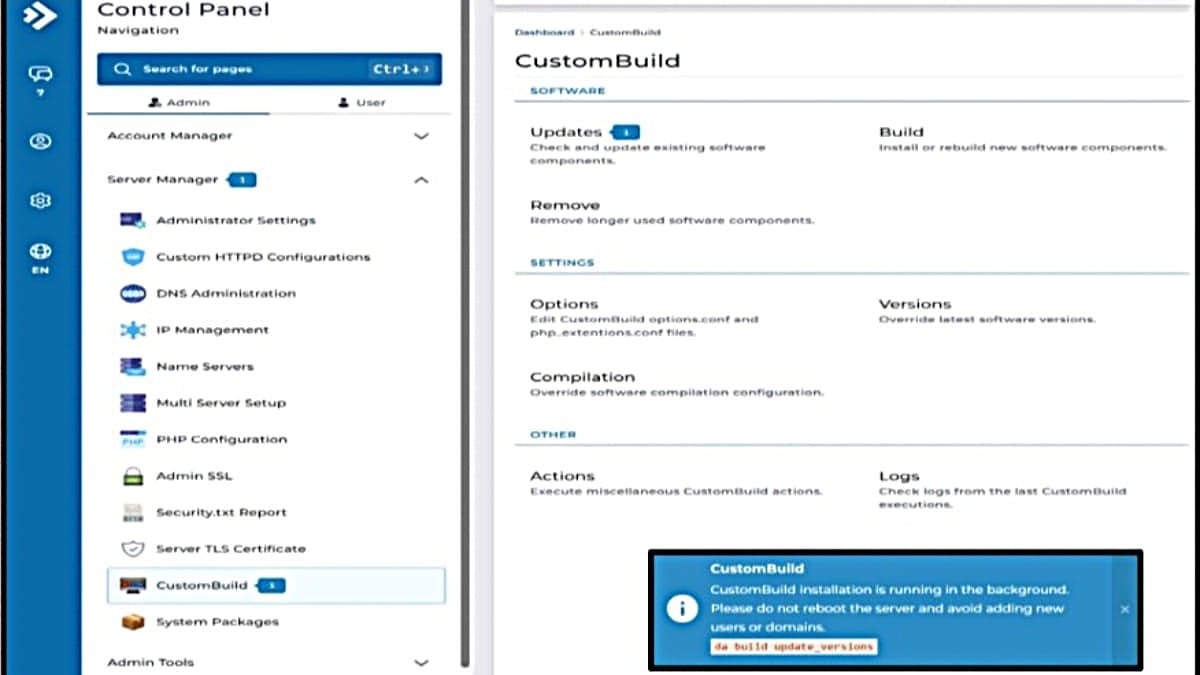
- Go to Server Manager → CustomBuild → Options
- Apply the following CustomBuild option changes:
- PHP Settings
phpl_release: 8.x (your chosen version)php_ini: Yes
- PHP Extension Settings (scroll down ~60%)
php_igbinary: Yesphp_imagick: Yesphp_ioncube: Yes (required is planning or using Softaculous)php_redis: Yes (if using redis for any form of caching)
- Cronjob Settings
email:admin@<your-domain-name>notifications: Yes
- Advanced Settings
redis: Yes- This triggers installation of the Redis service.
- PHP Settings
- Click Update Settings.
Apply CustomBuild Updates
DirectAdmin’s CustomBuild updates are done by following 3 easy steps.
- See the notification indicator of a suggested update and its count quantity.
- Go to the updates area and see the list of a bulk update option or a list of individual updates available.
- Perform the bulk or individual updates, as desired or needed.

Next, follow the actions to apply the updates in this case, since OpenLiteSpeed was installed.
- From the DirectAdmin Control Panel (Admin level):
- Go to Server Manager → CustomBuild → Updates
- Click Update All.
After clicking to <Update All>, a terminal session window appears with a blue message progress. Stay on that screen until it’s done. Then, perform the remaining steps.

- Wait until all updates complete:
- Processing typically takes about 3 minutes.
- The page auto-refreshes.
- No completion notification is shown.
- After the message indicating LiteSpeed service restart appears:
- Wait approximately 15 seconds.
- Reboot the server.
Optional Post‑Update Command‑Line Verification
After the reboot, you can optionally verify that all required services and extensions are running correctly. Here are some code block examples of things you can check to confirm.
Code Block 1. Verify OpenLiteSpeed is Running.
systemctl status lsws
Expected state: active (running)
Code Block 2. Verify PHP Version is applied.
php -v
Expected: PHP 8.x.x (of the version you previously selected to update)
Code Block 3. Verify PHP Extensions by showing a list
php -m | egrep 'imagick|redis|ioncube|igbinary'
Expected: all listed extensions present
Code Block 4. Verify Redis Service is running.
systemctl status redis
Expected state: active (running)
Code Block5. Verify Redis Service actively responds.
redis-cli ping
Expected output: PONG
Next Steps
Depending on what brought you here, you can easily return to that exact area on the page. Just, click any of these specific areas or checklist sections you recognize that led you here.
- Complete Setup Guide: Return to section “Perform steps after OpenLiteSpeed is installed” and continue after checklist of CustomBuild Requirements After OpenLiteSpeed Install.
- DirectAdmin: Return to section “DirectAdmin Phases” and continue after numbered item of Aligning CustomBuild settings after OpenLiteSpeed installation.